A Simple Tutorial to Help You Make a Four Wheeler Locomotive Toy
A workable wooden toy for all ages. Make a dozen bins to carry all sorts of small odds and ends.
TOOLS
Handsaw
Backsaw
Hand or power drill
½-inch drill bit
⅜-inch drill bit
Miter box
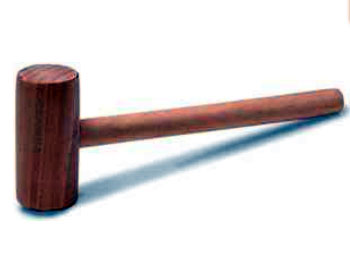
Mallet
Clamps
Wood rasp
Ruler
Pencil and paper
Backsaw
Hand or power drill
½-inch drill bit
⅜-inch drill bit
Miter box
Mallet
Clamps
Wood rasp
Ruler
Pencil and paper
MATERIALS
Wood
(Use a light hardwood for the engine and any hardwood for the rest. The axles, wheels, and steam chute are cut from wheels.)
Engine: (1) 3 by 5 by 6 inches
Each bin car: (5) ½ by 4 by 4 inches
Caboose: (1) 4 by 4 by 4 inches
Caboose cabin: (1) ½ by 3 by 3 inches
Cattle guard: (1) 3 by 1 by 1½ inches
Each axle: (1) ⅜ inch in diameter by 4 inches
Each wheel: (1) 1 inch in diameter by ½ inch
Steam chute: (1) ½ inch in diameter by 3 inches
Screw eyes to connect cars
String to connect screw eyes
Glue
Finishing materials (See instructions)
THE TOY
A train such as this is one of the staple items in any woodworker's collection of toys made. The train can be fitted with any number of different cars and can be converted into a logger, tanker, stake body car, coal car, or whatever the imagination comes up with.
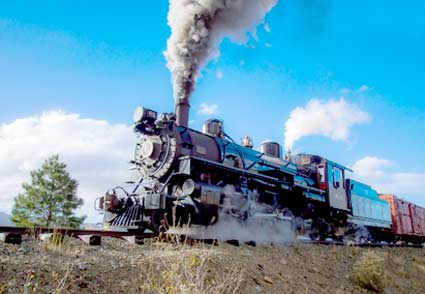
A train of this design is reminiscent of the narrow-gauge machines that used to puff their way through the remote European countryside. In many out-of-the-way places these trains still exist.
A train of this design is reminiscent of the narrow-gauge machines that used to puff their way through the remote European countryside. In many out-of-the-way places these trains still exist.
The sideward twisting of the cars is achieved by means of lashing together the screw eyes on the front and back of each car by means of a bit of twine. The largest car is the locomotive, which is made from a square piece of wood.
You simply round off the front portion of the locomotive by means of a wood rasp to provide the necessary body styling.
You simply round off the front portion of the locomotive by means of a wood rasp to provide the necessary body styling.
PROCEDURE
Mark all wood pieces with lines for cutting and cut with the handsaw. The pieces must be straight to effect a good joint. Use the miter box and handsaw when cutting the mitered edges for the bin cars.
At this scale, the mitered look is more convincing than the butt-end joint. Glue the four sides of the bins together, position, and clamp. Repeat the process for every bin car. The bottoms will be positioned later.
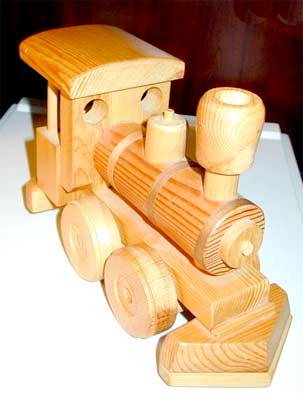
Divide the block for the locomotive in half by means of a pencil line. Round the forward half with the wood rasp to resemble the front end of the train pictured in the photo above. Leave the back half as is.
Cut the cattle guard with a wedge shape toward the front to give it a "scooped" look. The cattle guard is as wide as the locomotive.
Make the caboose car by centering the smaller piece on the 4- by 4- by 4-inch block. Glue, clamp, and let dry. Measure and drill the holes through which the axles will be placed.
Drill ½-inch- diameter holes in the bins, the locomotive, and the caboose. The locomotive has three holes, instead of the usual two.
Cut all axles from the dowel rod, each measuring 4 inches long. Cut all wheels from the 1-inch-diameter dowel, each one measuring ½ inch.
Drill all dowels that are to be used as wheels using the ⅜-inch bit. The bore must be in the center of the dowel to keep the wheel's motion "in round." Add the bottom panels to the bins, glue, and clamp in place.
Drill a hole in the top on the rounded portion of the locomotive toward the front edge for the steam chute. Glue the dowel and place it in the hole. The front of the locomotive also has a small piece of dowel applied to the face of the wood to suggest a headlight.
Insert axles through train cars. Put a small amount of glue on each dowel end and tap wheels in place with the mallet.
At this scale, the mitered look is more convincing than the butt-end joint. Glue the four sides of the bins together, position, and clamp. Repeat the process for every bin car. The bottoms will be positioned later.
Divide the block for the locomotive in half by means of a pencil line. Round the forward half with the wood rasp to resemble the front end of the train pictured in the photo above. Leave the back half as is.
Cut the cattle guard with a wedge shape toward the front to give it a "scooped" look. The cattle guard is as wide as the locomotive.
Make the caboose car by centering the smaller piece on the 4- by 4- by 4-inch block. Glue, clamp, and let dry. Measure and drill the holes through which the axles will be placed.
Drill ½-inch- diameter holes in the bins, the locomotive, and the caboose. The locomotive has three holes, instead of the usual two.
Cut all axles from the dowel rod, each measuring 4 inches long. Cut all wheels from the 1-inch-diameter dowel, each one measuring ½ inch.
Drill all dowels that are to be used as wheels using the ⅜-inch bit. The bore must be in the center of the dowel to keep the wheel's motion "in round." Add the bottom panels to the bins, glue, and clamp in place.
Drill a hole in the top on the rounded portion of the locomotive toward the front edge for the steam chute. Glue the dowel and place it in the hole. The front of the locomotive also has a small piece of dowel applied to the face of the wood to suggest a headlight.
Insert axles through train cars. Put a small amount of glue on each dowel end and tap wheels in place with the mallet.
The axles must spin freely to enable the train to move along to its next destination. Sand all surfaces and bring each car to the usual finishing state.
FINISHING
Apply wax and buff to a sheen to give the train a hand-polished look. Spray lacquer or an oil stain is appropriate for those situations where the wood lacks any distinctive visual qualities, or when the wood is toned to make it resemble a more exotic wood.
Oil stains must be worked into the surface of the wood and rubbed every few days to give a convincing finish to the overall toy. Stain must be worked quickly.
If not, streaks occur, and, unless they are to be construed as grain lines, they are undesirable.
Oil stains must be worked into the surface of the wood and rubbed every few days to give a convincing finish to the overall toy. Stain must be worked quickly.
If not, streaks occur, and, unless they are to be construed as grain lines, they are undesirable.
