A Simple-to-Follow Guide for Creating a Cab-Over-Engine Toy Truck

As with the tractor cab, this cab-over-engine truck can haul any of the toy trailer projects featured on this site. Or, you can make several intermediate size trucks. For example, you can lengthen the base to accommodate the crane. Also, you can devise your own hi-cube or dump truck. The design possibilities are endless.
PROCEDURE FOR MAKING THE TOY
1. BASE
Cut the base to shape as shown. If you’re making a longer truck, all you have to do is make the wheel cutout consistent at the rear of the base.
Cut the base to shape as shown. If you’re making a longer truck, all you have to do is make the wheel cutout consistent at the rear of the base.
After cutting out the rear wheel notches, drill the 3/8"-diameter exhaust stack holes. Next, drill the 5/16"-diameter axle holes through the axle holders, and glue and clamp these to the base.
2. CAB
Begin cab construction by gluing and clamping four pieces of 3/4" x 3-1/4" x 4-1/4" stock together to form the basic cab block. After the glue dries, sand the block square and transfer the cab pattern to it from the diagram below. Cut out the cab using a bandsaw, scroll saw, or coping saw.
2. CAB
Begin cab construction by gluing and clamping four pieces of 3/4" x 3-1/4" x 4-1/4" stock together to form the basic cab block. After the glue dries, sand the block square and transfer the cab pattern to it from the diagram below. Cut out the cab using a bandsaw, scroll saw, or coping saw.
Drill a 1/4"-diameter hole for the steering column and insert the column in the hole, but don’t glue it in place (the steering wheel will be added later). Finally, glue and clamp the cab to the chassis and check the steering column to make sure it still turns. Set assembly aside.
3. ENGINE
The engine is made from 3/8" stock. Make the piece out of a 3/4"' thick piece; then resaw the stock, reserving the extra engine for another truck. Round off the edges of the engine according to the instructions.
Next, drill the 3/4”-diameter holes for the headlights in the front of the engine; then glue Ihe lights in place. Glue and clamp the engine to the chassis. After the glue dries, sand the sides of the truck flush.
4. FENDERS
To make the fenders, cut the stock to size, then use a 2-1/2"-diameter hole saw and cut the circular profile as shown below. Round off the top and front outside edges.
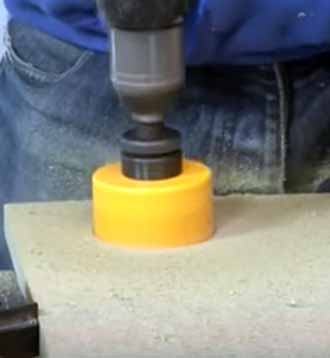
NOTE: There is a right and left fender, and they are not interchangeable. Be sure to mark the edges you are going to round.
Glue and clamp the fenders to the truck assembly.
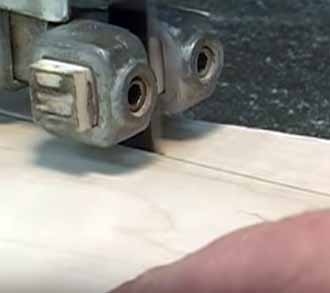
5. WHEELS
Make the wheels with a 2-1/8"-diameter hole saw. Before you cut them out of the stock, use a 1-1 /2"-diameter hole saw to make a 1/16"-deep kerf to define the rim and tire. Next, cut out the wheels using the larger hole saw.
Mount the wheels on an arbor and sand them; then assemble the wheels and axles to the truck assembly with glue. While you’re at it, cut out the 1-1/4"-diameter steering wheel using a 1-3/8"-diameter hole saw. Sand the steering wheel, then glue it to the steering column.
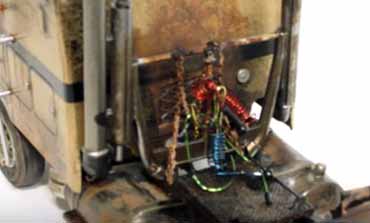
6. TRAILER HITCH
Cut the trailer hitch to size according to the materials list. Drill the 7/16"-diameter hole as indicated in the photo below; then sand the bevel on the top. Glue and clamp the hitch to the truck assembly.
Glue and clamp the fenders to the truck assembly.
5. WHEELS
Make the wheels with a 2-1/8"-diameter hole saw. Before you cut them out of the stock, use a 1-1 /2"-diameter hole saw to make a 1/16"-deep kerf to define the rim and tire. Next, cut out the wheels using the larger hole saw.
Mount the wheels on an arbor and sand them; then assemble the wheels and axles to the truck assembly with glue. While you’re at it, cut out the 1-1/4"-diameter steering wheel using a 1-3/8"-diameter hole saw. Sand the steering wheel, then glue it to the steering column.
6. TRAILER HITCH
Cut the trailer hitch to size according to the materials list. Drill the 7/16"-diameter hole as indicated in the photo below; then sand the bevel on the top. Glue and clamp the hitch to the truck assembly.
7. EXHAUST STACKS
The exhaust stacks are composed of two parts—a 3/4" dowel and a 3/8" dowel. First, drill a 3/8" hole through the length of the 3/4" dowel. Be sure the 3/4" dowel is securely clamped to the drill press table. Next, glue the 3/8" dowel into place. For a realistic touch, you may want to add ventilation holes by drilling a series of 1 /8"-diameter holes on each stack.
8. ROOF LIGHTS
Drill three 1/4”-diameter holes in a 1/2" x 3/4" x 2" piece of stock according to the instructions. Cut the stock in two to form the roof light holder. Glue the 1/4"-diameter roof lights into place; then glue and clamp the light block assembly to the roof.
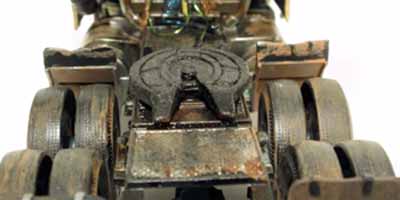
9. FRONT BUMPER
The easiest way to make the front bumper is to form a block of stock with the proper profile, then cut the block into 1/4"-thick pieces. Save extra bumpers for other trucks. Glue the bumper in place.
Your cab-over-engine truck is now complete and ready for a trailer. Roll on to the trailer section and build the kind of trailer or trailers you require.
The exhaust stacks are composed of two parts—a 3/4" dowel and a 3/8" dowel. First, drill a 3/8" hole through the length of the 3/4" dowel. Be sure the 3/4" dowel is securely clamped to the drill press table. Next, glue the 3/8" dowel into place. For a realistic touch, you may want to add ventilation holes by drilling a series of 1 /8"-diameter holes on each stack.
8. ROOF LIGHTS
Drill three 1/4”-diameter holes in a 1/2" x 3/4" x 2" piece of stock according to the instructions. Cut the stock in two to form the roof light holder. Glue the 1/4"-diameter roof lights into place; then glue and clamp the light block assembly to the roof.
9. FRONT BUMPER
The easiest way to make the front bumper is to form a block of stock with the proper profile, then cut the block into 1/4"-thick pieces. Save extra bumpers for other trucks. Glue the bumper in place.
Your cab-over-engine truck is now complete and ready for a trailer. Roll on to the trailer section and build the kind of trailer or trailers you require.
