Here’s How You Build a Custom Low-Boy Trailer Toy
The primary purpose of the low-boy trailer is to haul steamrollers, bulldozers, cranes, and road graders from one building site to another. These trailers are an integral part of any construction company—including your child’s.
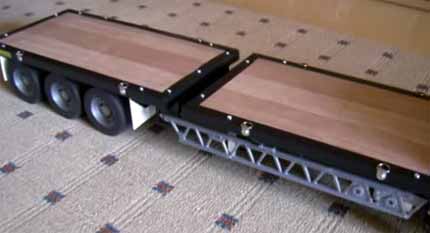
The trailer is easy to build and is suitable for the bulldozer and crane. You’ll need a longer trailer for the steamroller or road grader; just build a longer bed. When making one of these trailers, take time to build some extras.
BUILDING THE TOY
1. PREPARATION
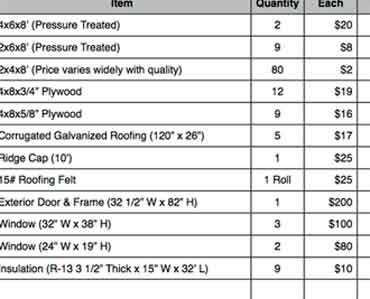
Cut all the parts listed under materials (see the picture below). For a longer trailer, change the length of part A—all other parts remain the same. As with all the toy vehicle creation projects found on this website, be sure to make extra parts.
Cut all the parts listed under materials (see the picture below). For a longer trailer, change the length of part A—all other parts remain the same. As with all the toy vehicle creation projects found on this website, be sure to make extra parts.
2. FLOOR
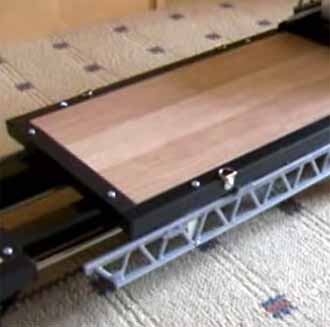
Lay out the front contour of the trailer floor on the stock. Using a handsaw or scroll saw, cut the floor to shape. If you want a longer floor, cut a longer piece of stock, but keep the front profile the same. Glue and clamp the floor stops into place; then set the assembly aside.
3. COUPLING ARM
Lay out the profile of the coupling arm on a piece of stock. For additional strength in the arm, place the coupling arm on the stock so the grain runs diagonally across it. Cut out the arm and drill a 3/8"-diameter hole in the end of it for a coupling pin. Glue the pin into place; then glue and clamp the coupling arm to the trailer floor.
After the glue has thoroughly dried, drill a 2-1/2"-deep hole through the bottom of the floor up through the coupling arm. Glue a reinforcing pin into the hole and sand flush.
4. AXLE HOLDER
After you've prepared the stock for the axle holder, clamp it securely to a drill press table and drill the 5/16"-diameter axle holes in it. Next, glue and clamp the holder to the spacer. After the glue has dried, glue and clamp the assembly to the floor.
5. WHEELS
Make the wheels by first forming the 1/8"-deep wheel rims with a 3/4"-diameter hole saw. Next, use a 1-3/8"-diameter hole saw to cut out the 1-1/4"-diameter wheels. After the wheels have been cut out, sand them smooth. Finally, cut the axles to length and assemble them with glue to the wheels and the axle holder.
The low-boy trailer is ready to go to work for your child’s construction crew toys and provide much-needed assistance in transporting all that equipment to the next site!
